Want a big kitchen update without replacing everything? or Learn How to Paint Cabinets? We ask this because a fresh coat can transform a space faster and for less than a full replacement. That choice matters for budgets and timelines.
We are MR Paint — craftsmanship, clean work, guaranteed results. Since 2011 we’ve grown on referrals by showing up on time, keeping job sites tidy, and standing behind our work.
In this guide we set clear expectations: proper prep, primer choices, paint selection, application technique, protection, and reassembly. Our focus is adhesion, smooth leveling, and long-term durability—because daily use demands a resilient finish.
This guide is for homeowners who want a professional-looking result without guessing. We also preview common failures we help you avoid—grease left behind, skipped labeling, rushed dry times, and heavy coats. Reach us from South Amboy, NJ; we serve locations within a 35-mile driving radius.
Key Takeaways
- Painting is cost-effective: major visual impact at a fraction of replacement cost.
- Preparation wins: clean prep and the right materials prevent failures.
- Durable finish: we prioritize adhesion and smooth leveling for daily use.
- Local craft: MR Paint has served Central New Jersey since 2011 with reliable, clean work.
- Avoid common mistakes: don’t skip cleaning, labeling, or proper dry times.
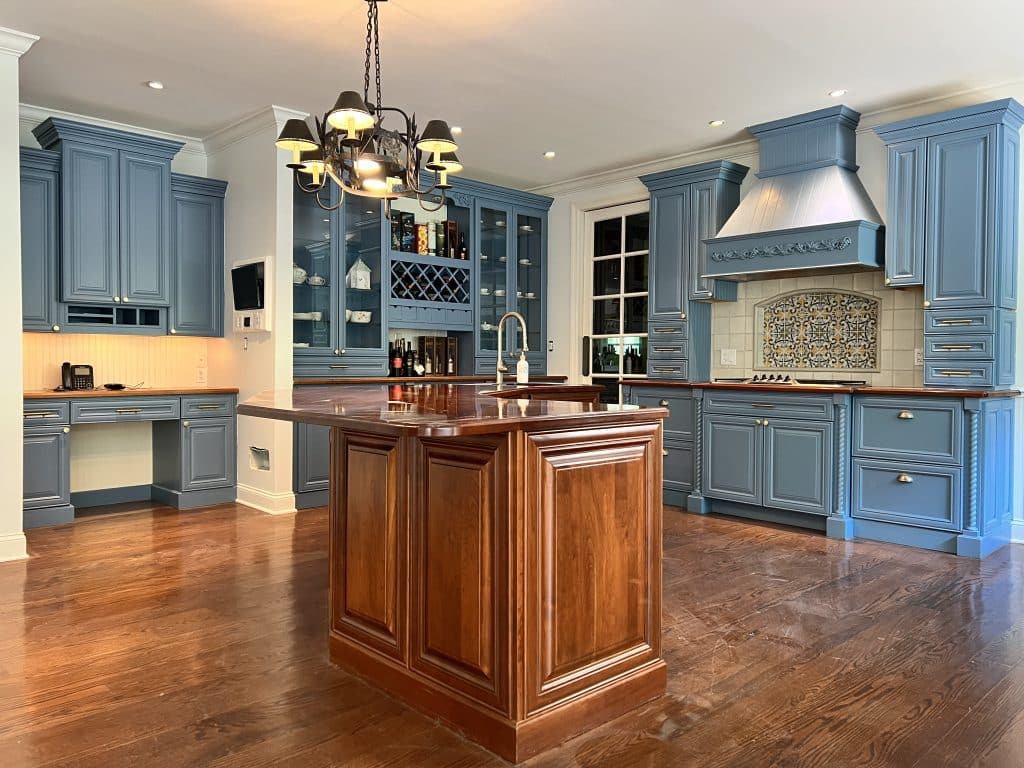
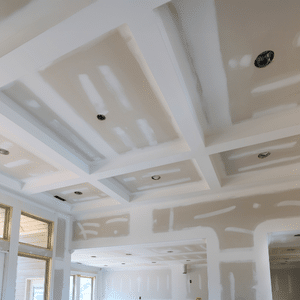
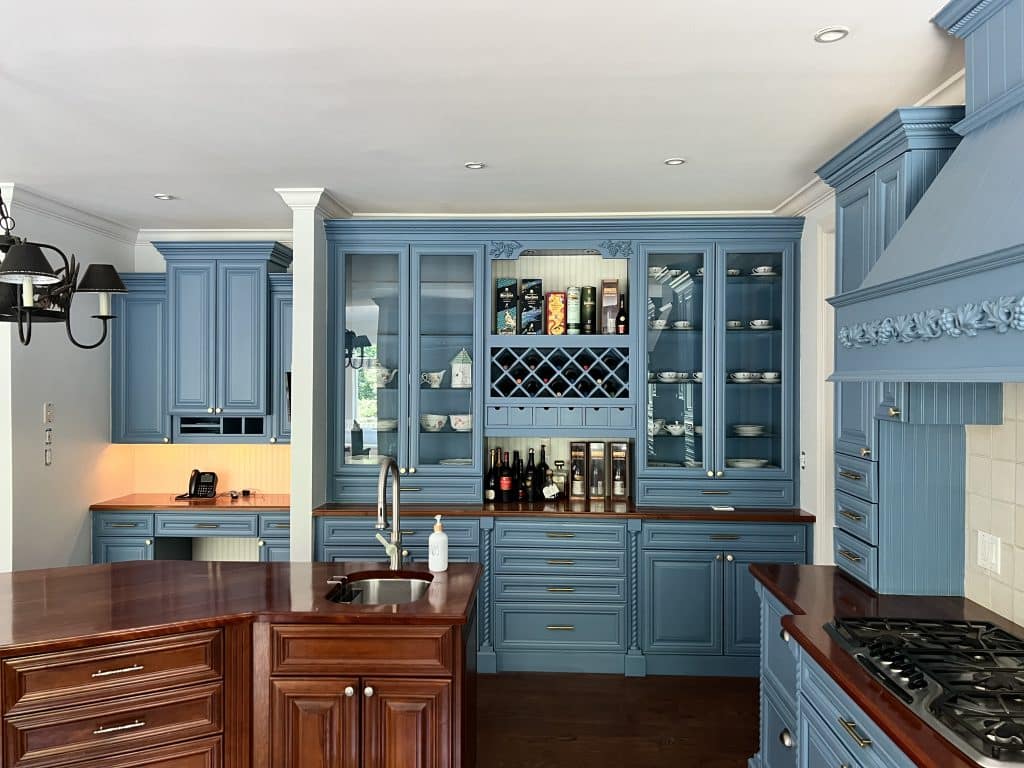
Why Painting Kitchen Cabinets Is the Smart Upgrade
A fresh finish delivers big impact with far less cost and disruption. Repainting is often the fastest route to a modern kitchen that cleans and functions better. We focus on predictable timelines and clean job sites so daily life is minimally affected.
Painted cabinets vs. replacement: cost, time, and impact
Budget: Replacing cabinets costs much more. Refinish work keeps existing boxes and changes the look for a fraction of the price.
Disruption: A replacement can take weeks. A properly planned project finishes quicker and with less mess.
What “professional-looking” results really depend on
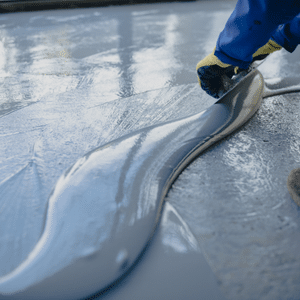
Great results start with cleaning, de-greasing, and correct surface prep — not rushing color choice. We use premium materials that level out for smooth surfaces and crisp edges.
- Prep: deep cleaning and repairs.
- Materials: primers and paints designed for daily wear.
- Technique: detail-driven application and clean work practices.
That approach gives you brighter counters, easier cleaning, and a refreshed kitchen without a full remodel. We plan each step so the time you lose is time well spent.
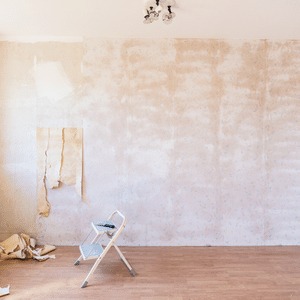
Before You Start: Decide If Your Cabinets Are Good Candidates
Before you lift a brush, identify the material and condition of each unit. A quick check saves time and prevents wasted effort. We’ll walk you through what matters most.
Wood, previously painted, laminate, and stained finishes
Solid wood and veneers usually accept coatings well with proper sanding and priming. Stained pieces may need stain-blocking primer for dark knots. Previously painted surfaces require scuffing or spot-stripping. Laminate and slick finishes need a bonding primer for lasting adhesion.
When damage or failing finishes change the plan
- Red flags: peeling paint, swollen doors, water damage, or crumbling edges.
- Test a hidden area with cleaner and light abrasion to see if the finish lifts.
- If doors warp or the substrate is soft, replacement is often wiser than a quick refinish.
- We’ll help you choose a diy route or call a pro when durability matters most.
Our goal: match method to material for a finish that lasts. We’ll adjust the plan—no surprises, just results.
Tools, Materials, and Workspace Setup for a Clean Cabinet Paint Job
A clean, organized workspace is the foundation of any lasting cabinet refresh. We protect counters, control dust, and keep the kitchen usable while work is underway.
Cleaners and degreasers that actually cut kitchen grease
Use a heavy-duty degreaser or TSP for stubborn grease. This step is critical — grease is the main reason paint fails.
Sanding and dust-control essentials
Start with medium-grit sanding for scuff work, then fine grit for smoothing. Vacuum between passes and finish with a tack cloth to remove fine dust.
Brush, foam roller, and application choices
A quality brush gives control on profiles. A foam roller reduces texture on flat panels. Choose tools that match the surface for a level finish.
Masking and staging
- Painter tape and paper protect counters and appliances.
- Lay doors flat when possible; space drawers and doors apart for airflow.
- Cover floors and keep a clear path so the kitchen stays usable.
Our promise: neat protection, minimal dust, and durable results—every job. Follow these steps and the final finish will last.
How to Paint Cabinets: Step-by-Step Prep That Makes Paint Stick
Prep wins every time — neat work up front makes finishes last. We follow a clear sequence so adhesion holds and the final finish looks factory-clean.
Remove doors, drawers, and hardware — label everything
Take doors and drawers off and remove hardware. Number each door and record its location. This prevents alignment fights when reassembling.
Deep clean before any sanding
Use TSP or a heavy-duty degreaser first. Cleaning removes grease so you won’t sand contaminants into the surface.
Deglossing vs. scuff-sanding
For glossy finishes, a liquid deglosser can replace heavy sanding. For worn or peeled areas, scuff-sanding is safer for adhesion and leveling.
- Patch: fill old holes and smooth dings for flat panels.
- Spot-sand: feather repairs, then wipe with a tack cloth.
- Final check: clean dust from hinges and rails before work proceeds.
Primer or No Primer: What Today’s Best Methods Recommend
Primer can be insurance—cheap, fast, and critical when stains or slick surfaces are present. Make the choice with simple rules. That keeps the job clean and the result durable.
When primer is truly needed: use it for wood with dark knots, tannin stains, or old discolored areas. A coat blocks bleeding and stops stains from showing through the final paint coat.
When you can skip primer: recently finished, sanded wood with no stains and good tooth may accept paint without an undercoat. Still—test a small area first.
Fast pros’ options
- Shellac-based primer: fast-drying and excellent at sealing knots and tannins.
- Latex bonding primer: good where unknown glossy layers need better grip.
- Quick schedule: shellac products let us move faster without risking bleed-through.
What primer does for the finish: it evens sheen, gives truer color, and often cuts the number of paint coats needed. At MR Paint we don’t gamble—if primer will make the result last, we apply it.
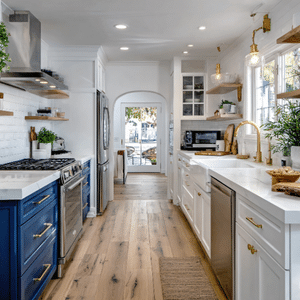
Choosing the Best Paint for Cabinets and the Right Sheen
Choose a premium paint and finish that stands up to daily kitchen wear. We pick materials that balance durability and a smooth look. A quality product cut downtime and keeps surfaces easy to clean.
What makes cabinet-specific paints different
Cabinet-specific paints cure harder and resist scuffs. They self-level better so brush marks are minimal. That matters for a pro-level finish on doors and drawers.
Acrylic, mineral, and enamel options
- Acrylic: fast dry, low odor, flexible—good for quick jobs.
- Mineral-style: very hard and durable for high-traffic kitchens.
- Enamel-style: satin or semi-gloss options give extra washability and long life.
Satin vs. semi-gloss vs. flat
Satin hides some grain and cleans well. Semi-gloss reflects more light and is easiest to wipe. Flat reduces grain visibility but needs careful cleaning. Pick sheen based on use and the look you want.
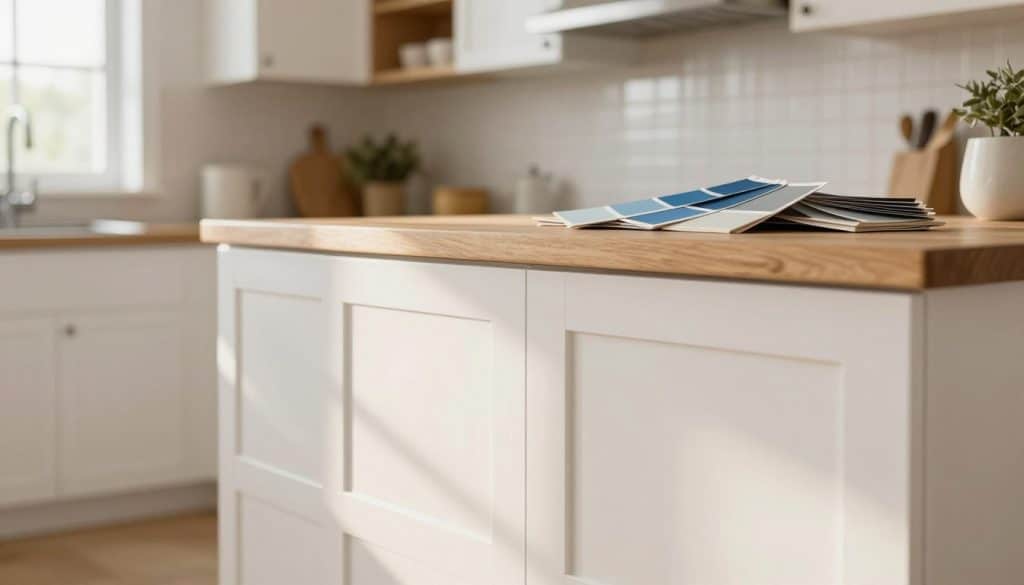
Color testing and final application tips
Sample a small door and view it morning, afternoon, and night under your kitchen lighting. Check color against countertops and floors.
Finish tip: use the right brush and roller for the product—this supports the self-leveling action and gives a smooth, consistent result across all cabinets.
Two Proven Cabinet Painting Methods Based on Your Timeline
Pick the route that balances long-term protection with the time you can spare. Below are two clear paths—one built for durability, the other for a fast turnaround. We give honest expectations so your project stays on schedule.
Durability-first approach
Best when longevity matters. This process centers on deep cleaning, minimal abrasion where needed, and extra protective topcoats.
- Major steps: thorough degrease, spot-sanding, primer when required, two thin finish coats, plus one protective topcoat.
- Timeframe: about 4 days with drying and recoat windows factored in.
- Trade-off: more time up front for a finish that resists daily wear.
Fast-turnaround approach
This path trims prep for a solid result when time is limited. Use a quick scuff-sand, targeted primer on slick areas, and efficient recoating.
- Major steps: clean, light sanding, prime spots, two finish coats.
- Timeframe: roughly 2 days when conditions and products allow.
- Trade-off: less protection than the first method—but still durable if steps are followed.
Planning note and practical tip
Batch doors and drawers so the kitchen stays usable. That step saves time and reduces disruption during the process.
For a full, step-by-step guide and timing examples, see our recommended resource: step-by-step guide.
Painting Cabinets Like a Pro: Coats, Technique, and Avoiding Brush Marks
Consistent technique beats heavy-handed painting every time. Thin, even layers are the core rule. A controlled approach gives a smooth finish and fewer fixes later.
Brush vs. roller — where each tool excels
Brush: best for profiles, grooves, and edges. Use a quality angled brush and light strokes along the grain.
Roller: ideal for flat door faces. A fine foam roller reduces texture and speeds coverage. Keep the roller thinly loaded.
Doors in place or laid flat — tradeoffs
Painting doors in place saves space and keeps the kitchen usable. Use thin coats and a controlled, steady hand to prevent drips.
Laying doors flat makes runs rare and helps the paint level. That step costs space but reduces touch-ups.
Even coverage on panels, edges, and grooves
Work panels first, then edges. Avoid overloading corners — paint pools there and causes buildup.
For grooves, drag the brush gently and follow with a light pass from the roller. Keep a wet edge and consistent direction.
Coats, recoat timing, and readiness checks
- Apply thin initial coat for adhesion and even color.
- Most cabinet systems need two coats for full coverage.
- Check the product recoat window — tack-free is not always ready for a second coat.
Ready for second coat: surface feels dry, not cold, and shows no tack when lightly touched. If unsure, wait the full recoat interval stated by the manufacturer.
Prevent drips, lap marks, and buildup
- Work in small sections and keep a wet edge.
- Thin coats beat thick ones — several thin coats outlast one heavy coat.
- Avoid overworking the finish; stop once the stroke levels out.
Repeat the same step sequence for every door and drawer. Consistency is the fastest path to a professional, durable finish.
Topcoat Protection and Curing Time for Long-Lasting Painted Cabinets
Topcoats are the unsung hero that turn a pretty finish into a resilient surface for daily use. They add abrasion resistance and make cleaning easier. We choose systems that match the base coat and intended use.
When a clear protective coat makes sense and how many are typical
Use a clear finish in high‑use kitchens, darker colors, or homes with kids and pets. A thin, quality coat stops scuffs and stains from reaching the finish.
- Typical strategy: one thin sealing coat, then one or two light top coats for heavy traffic.
- Technique: thin layers and proper flash time between coats prevent runs and pooling.
- Result: longer lasting finish with fewer touchups.
Prevent yellowing and choose a stable clear
Thick, pooled clear layers can amber over time. We avoid heavy application and prefer low‑yellowing formulas when color clarity matters.
Tip: pick a waterborne clear for clearer results and less risk of discoloration.
Dry time vs. cure time — what to expect in the next few days
Surfaces may feel dry after a few hours. Full cure takes several days. During that time the finish gains hardness and scratch resistance.
- Light use after 24–48 days is okay for some systems; avoid heavy stress for up to 7 days.
- Be gentle with hardware and cleaners during the cure period.
Our promise: we plan coat sequencing and cure time so your kitchen stays usable and the final work lasts. MR Paint stands behind durable results and clear expectations.
Reassembly, Hardware, and Final Touches That Elevate the Finish
Careful reassembly is where a great finish becomes a lasting upgrade. We label each door and drawer during teardown so rehanging is fast and accurate. That organization cuts alignment issues and protects fresh work.
Rehang doors and reinstall drawers without sticking or scuffing
Rehang doors gently. Respect cure time. Avoid over-tightening screws that can pull through thin, new film.
Check contact points. Adjust hinges for even reveals and smooth drawer travel. Small hinge tweaks fix most misalignments.
Replace knobs, pulls, and hinges for an instant style upgrade
- Hardware upgrades modernize cabinets fast and cost-effectively.
- Pick finishes that match the new finish and resist fingerprints.
- Install hardware last—this prevents scuffs during rehanging.
Final walkthrough checklist: alignment, touch-ups, and cleanup
- Make sure doors sit flush and gaps are consistent.
- Make sure drawers glide and lock without binding.
- Touch-up thin areas, remove tape, and clean edges.
Our standard: a clean job site, a careful final walkthrough, and satisfied customers. We don’t rush the last 5%—that’s where the job looks professional and the finish lasts.
When to Hire a Pro Cabinet Painter in Central New Jersey
Not every kitchen job is a DIY win—some projects need a pro’s eye and shop-grade setup. We help homeowners spot the red flags and choose the right route for lasting results.
Signs your project needs advanced prep or spray-grade results
Hire us if you see:
- Peeling finish, heavy staining, or visible knot bleed.
- Warped doors, soft substrate, or unknown glossy coatings.
- A desire for spray-grade results—clean booth, dust control, and fast leveling.
What MR Paint delivers
We bring craftsmanship, clean work, and guaranteed results. Our process uses specialty primer options—including fast-drying shellac—when stain blocking or adhesion insurance matters.
Simple, reliable process and service area
Clear communication up front. Reliable scheduling. Final walkthrough so nothing is missed.
Based in South Amboy, NJ, we serve locations within a 35-mile driving radius.
Our Process In Action
Ready to move forward?
Call (908) 963-7371 or email info@mrpaintnj.com. Established in 2011, we’ve grown on referrals by showing up on time and keeping every job clean.
What Our Clients Say
Conclusion
A careful sequence of prep and finish is the real secret behind durable results.
Recap the roadmap: cleaning, surface prep, primer choices, material selection, application technique, protection, and reassembly. Do each step with care.
The best way to get lasting painted cabinets is simple—remove grease, sand where needed, use the right system, and respect dry and cure times.
Focus on make-or-break areas: corners, edges, door fronts, and high-touch zones near handles. Small fixes there save major touch-ups later.
If you feel confident, follow this guide section by section and don’t rush cure time. Or call us for a pro, local option.
MR Paint — established 2011, referral-built, clean job sites, guaranteed results. Call (908) 963-7371 or email info@mrpaintnj.com for a quote in Central New Jersey.